Have you had a problem with your valve sticking? Or leaking air in or out of your system?
Well here is a step by step walk through on how to clean out your valves and make them work good as new.
1
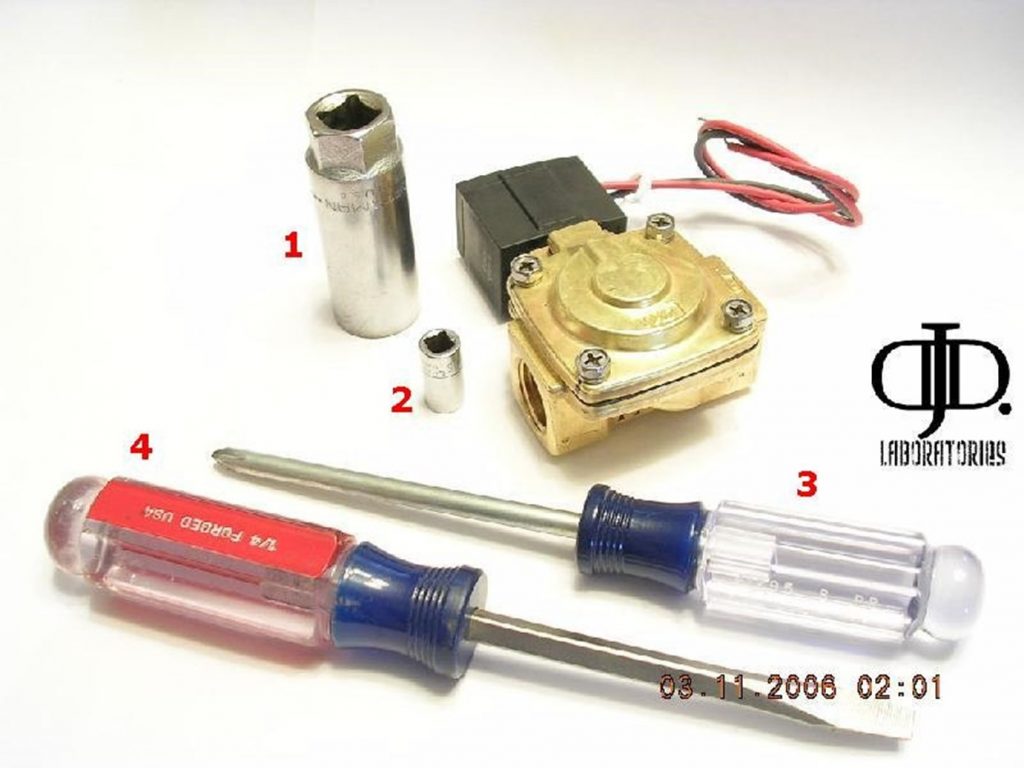
You are going to need a few tools for this
(1)15/16” 6 point Spark plug socket or Deep well.
- 5/16” 6 point socket
- #2 Philips screwdriver
- #2 Standard screwdriver
ALSO NEEDED:
A can of 99% Isopropyl alcohol for cleaning you can also use ethanol alcohol as well. A small bottle of Soy based White lithium grease. (Spray or paste)
After you collect the tools needed you can move on to step 2.
2
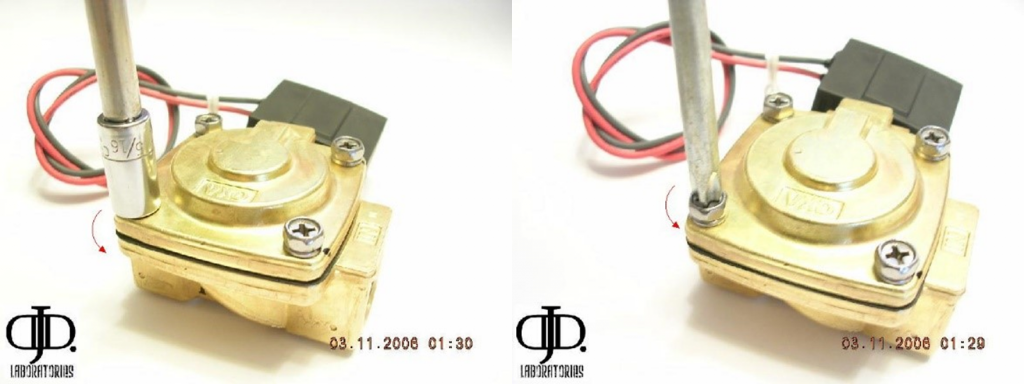
You can use the Philips screwdriver to remove the screws. Simply spin the screw counterclockwise. If the screw is very tight or is a hard location to reach you can use the 5/16” socket and wrench.
3
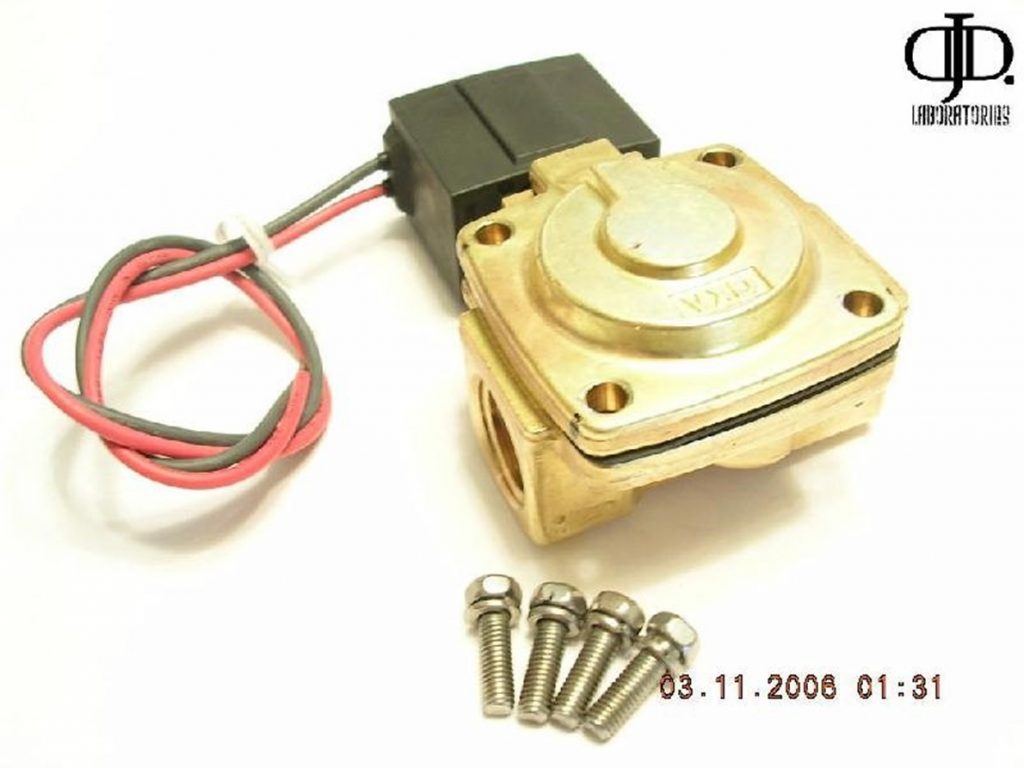
Remove all screws and place in a safe place (your pocket is not a safe place!)
A good trick is stick a magnet to your tank or frame and stick the screws to it.
4
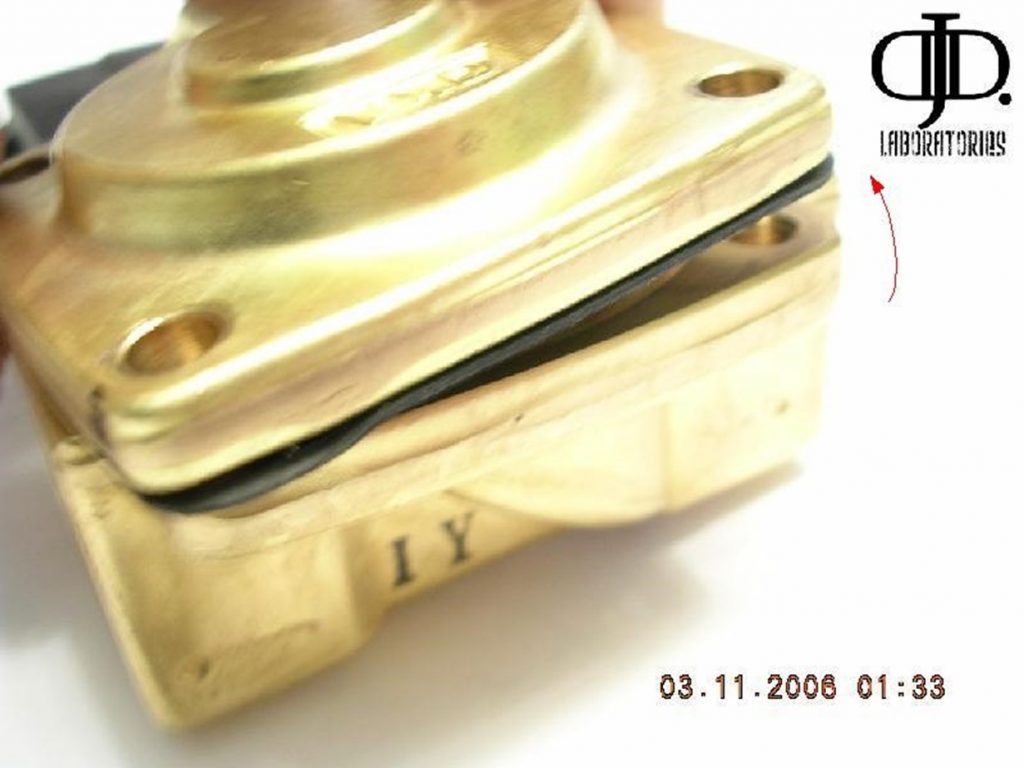
Now simply lift up on the upper valve body to remove. If seal is tight DO NOT stick anything into seam to pry valve open! Gently tap around the valve with the back end of your screw driver or socket wrench. To loosen the seal.
5
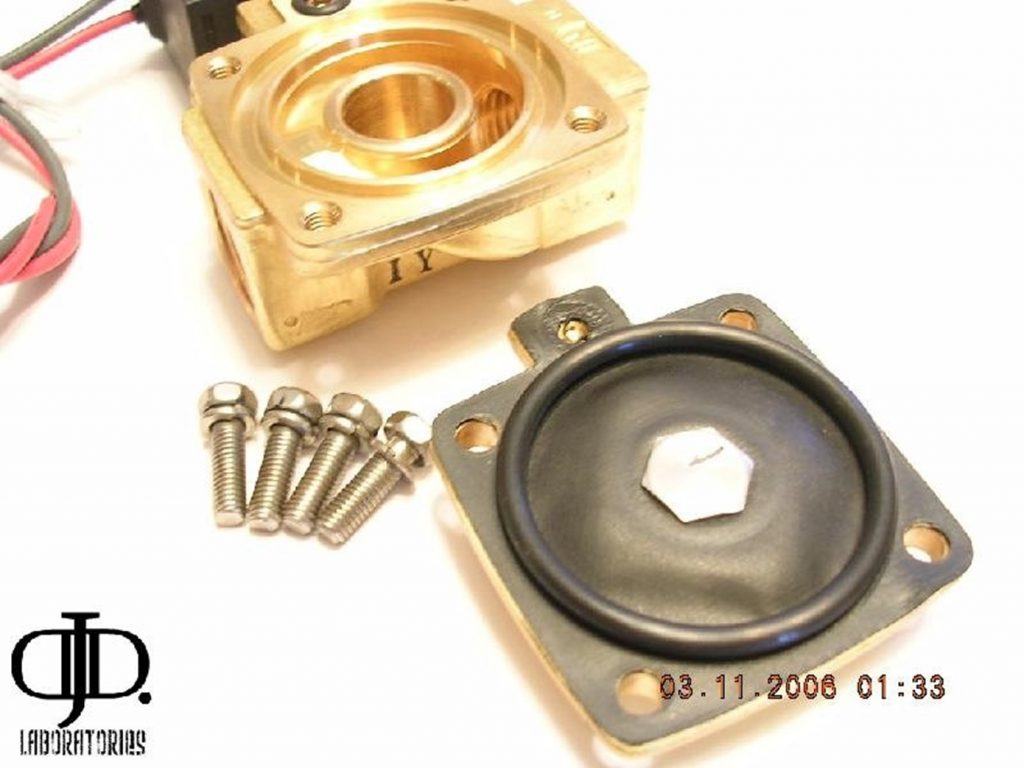
Now remove the entire assembly.
6
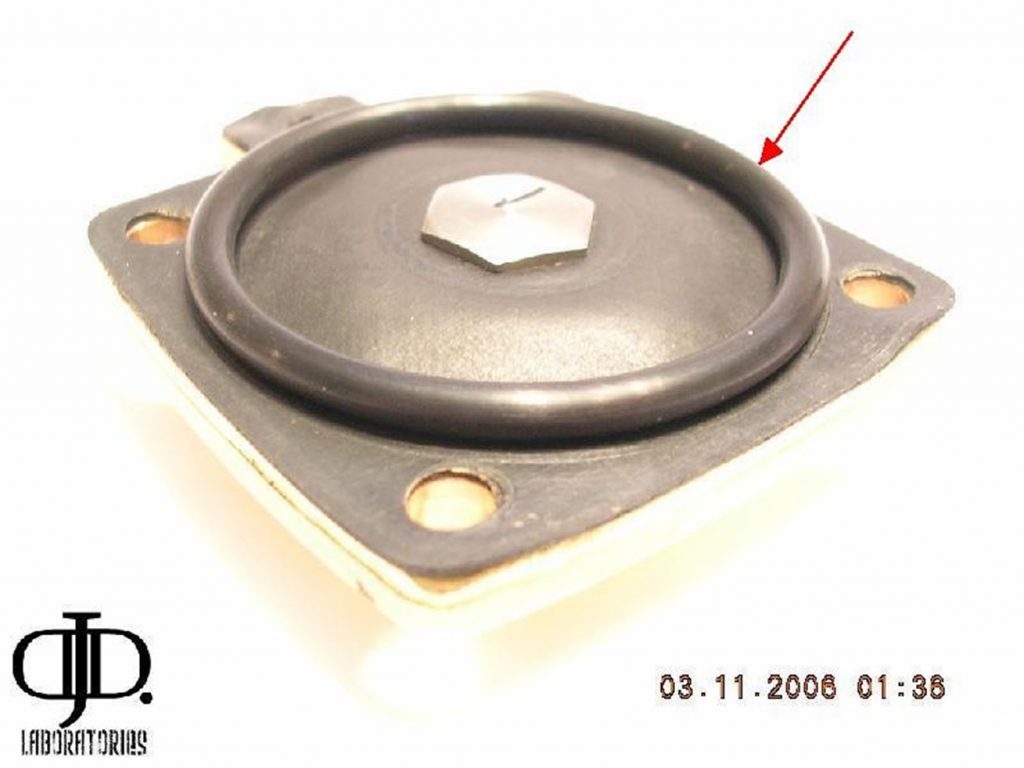
The ‘O’ Ring tends to stick the diaphragm surface. This is normal.
7
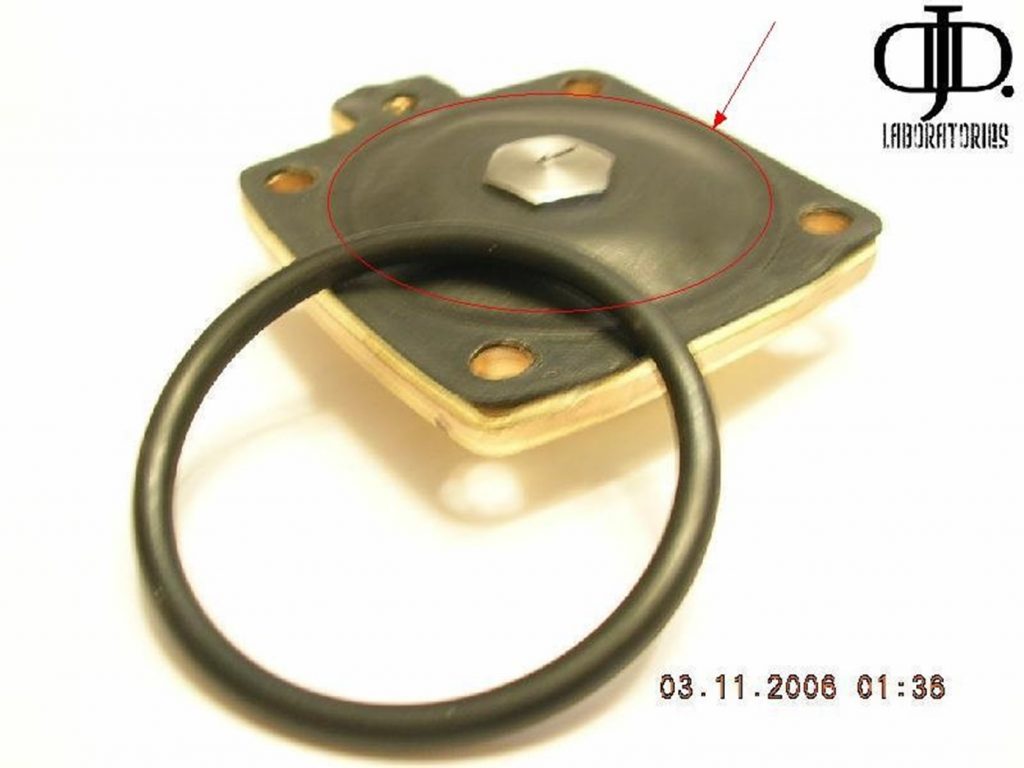
Simply pull up gently on the ‘O’ ring to remove it from the surface
Now inspect the surface directly under where the ‘O’ ring was located for abrasions rips holes or foreign matter stuck to the surface.
8
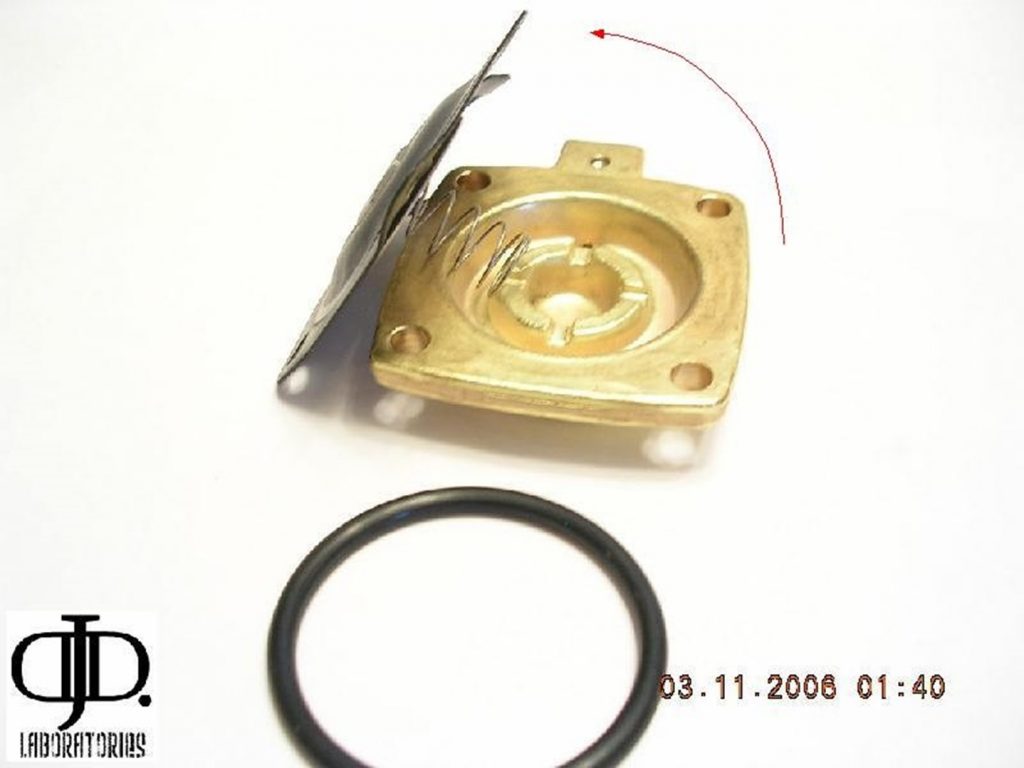
Now gently Peel up the Diaphragm from the remaining valve body. CAUTION: Be careful the spring under diaphragm is under pressure so it may send it flying so have your hands ready to catch what comes out.
9
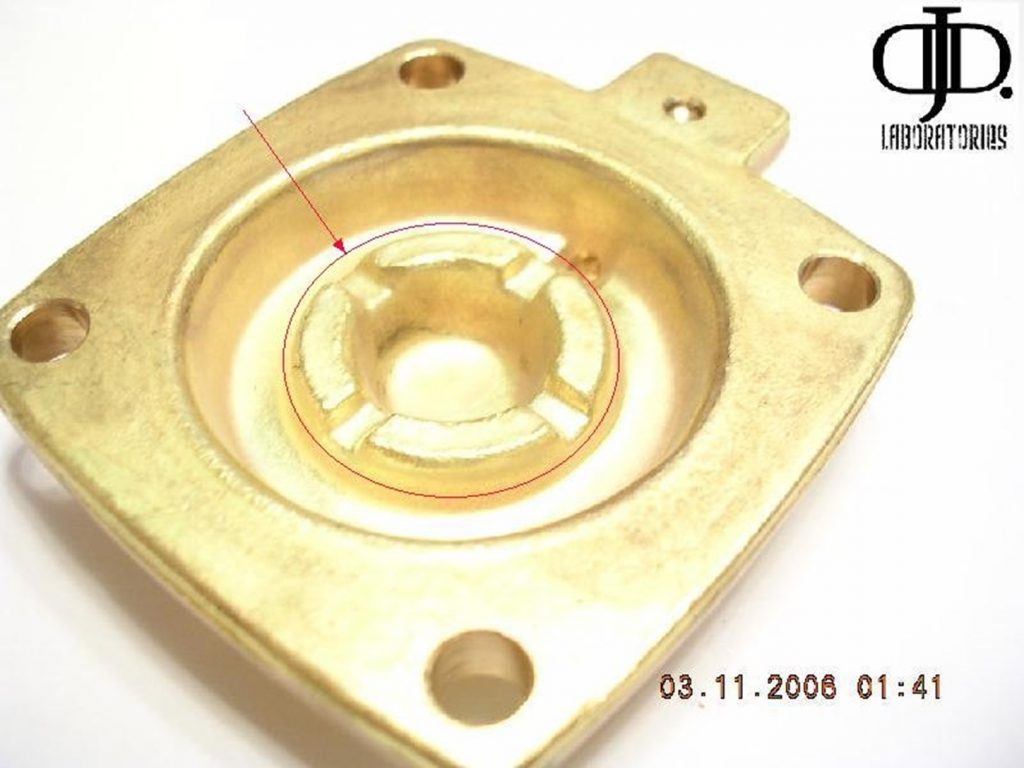
Inspect spring seat and surrounding Brass for any burrs or foreign matter stuck in this area. You can now clean this surface with a small amount of isopropyl alcohol on a lint free rag or paper towel.
10
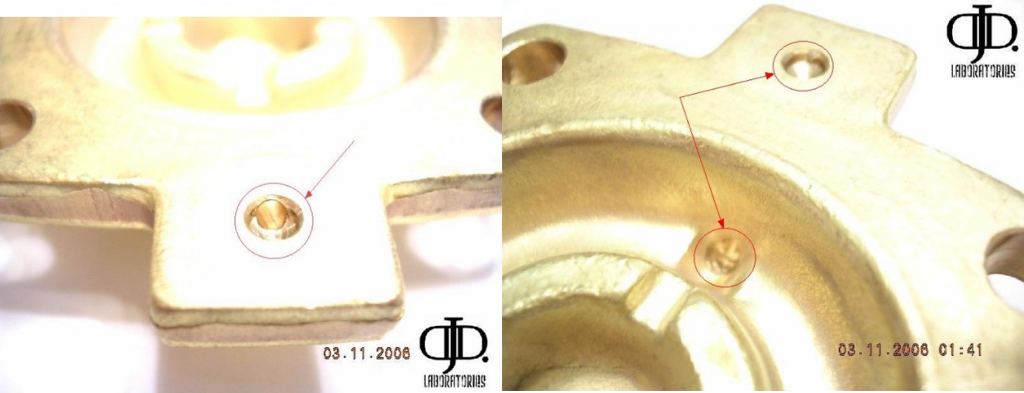
Check to make sure this passage way is clear of obstruction. If need be you can blow this out with compressed air , your mouth , or Soak this part in a batch of isopropyl alcohol.
Now let dry.
11
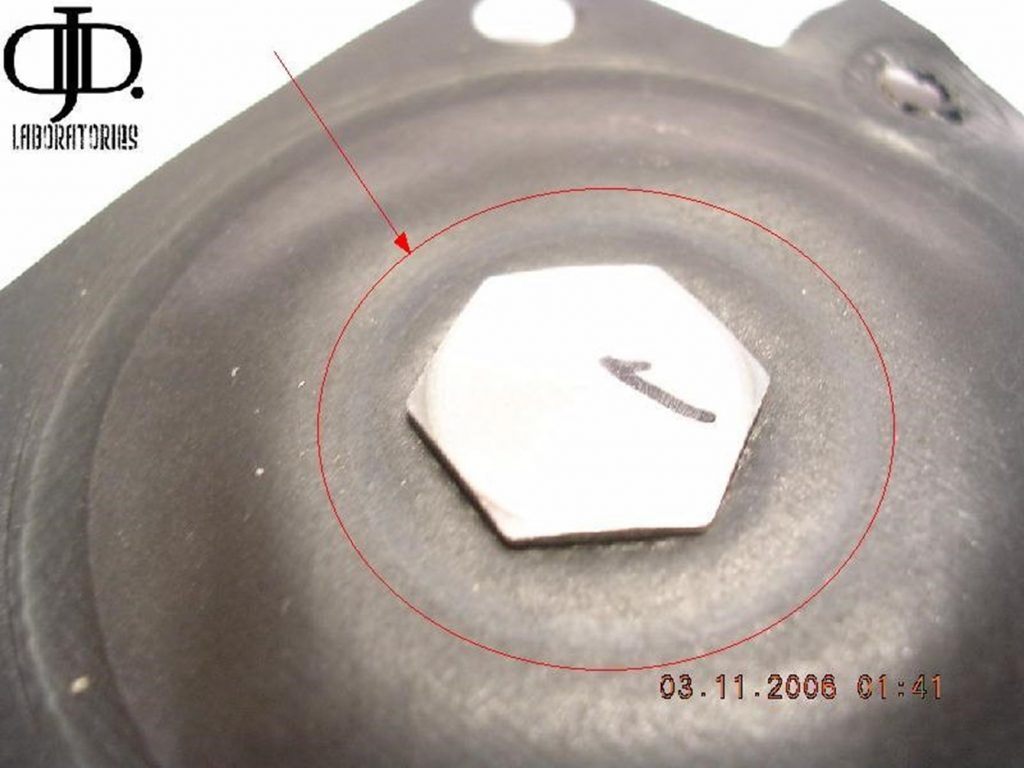
This is the ‘SEAT’ area of the diaphragm the part of the valve the seals the air from passage. Inspect this surface for any rips tears thin spots or foreign material.
IF you find any defects in this surface ANYWHERE you must replace it. A new diaphragm for this valve can be bought through www.Suicidedoors.com http://www.suicidedoors.com/SMCReplacementDiaphram12.php
12
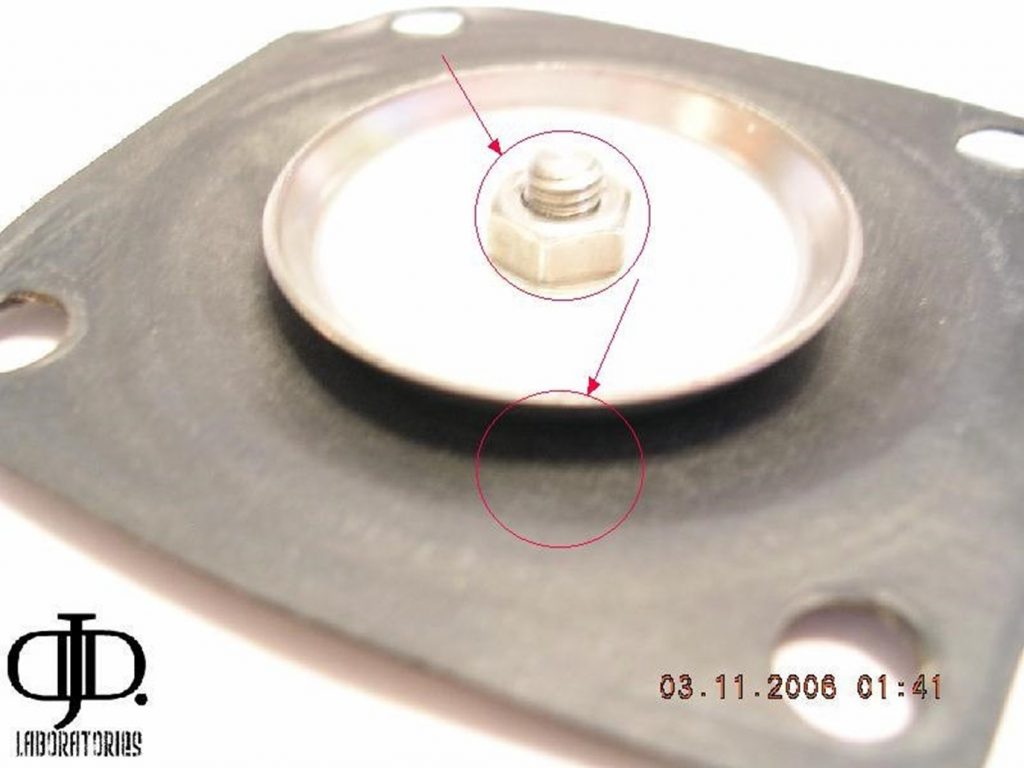
Now flip the Diaphragm over and inspect the surface below the metal ring for wear spots holes rips and or foreign material. And clean the diaphragm with your isopropyl alcohol.
Also inspect center locking bolt it should be firm and not loose. If loose simply re-tighten.
13
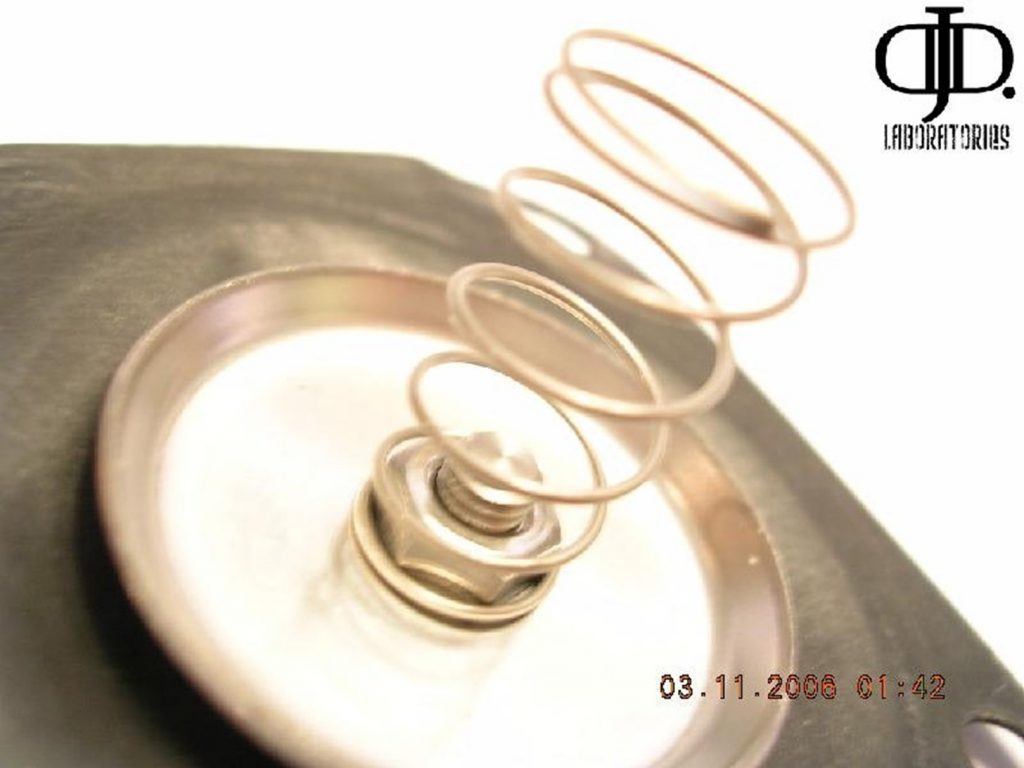
Now inspect your spring make sure it looks the same as above straight even and unbroken. If any of the above replace with the Suicidedoors.com diaphragm replacement. http://www.suicidedoors.com/SMCReplacementDiaphram12.php
14
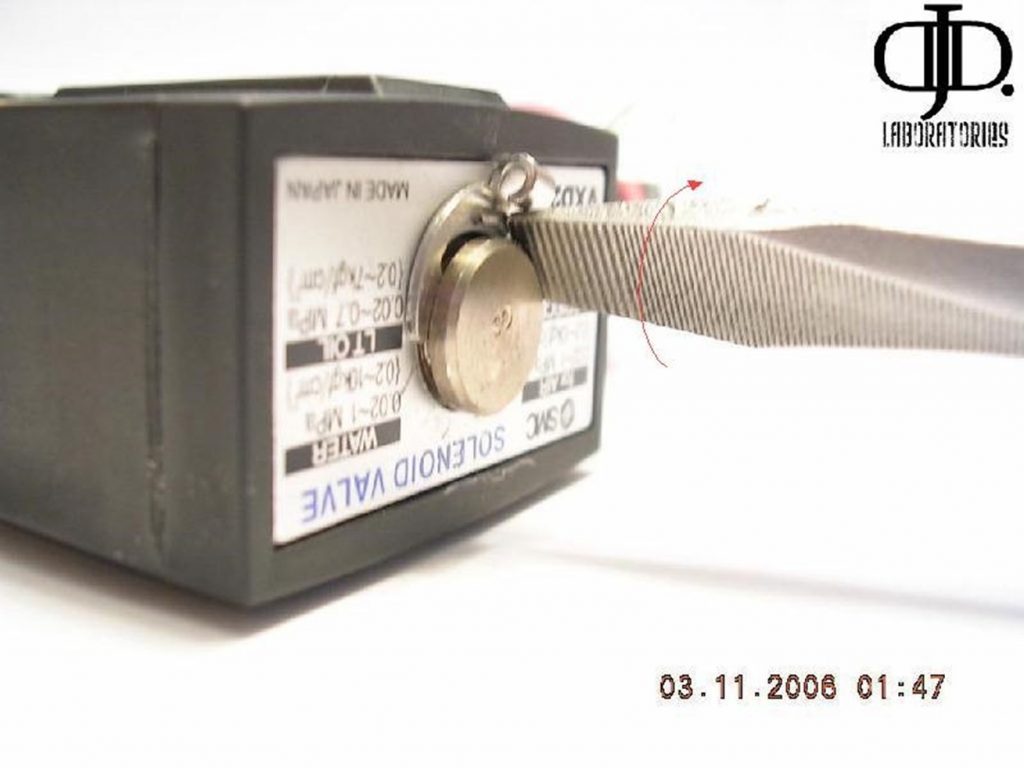
Now back to the main valve body. We will now remove the coil. Grab your standard screwdriver and insert it between the spring clip and the center pin and slightly twist clockwise as to push the spring clip out from under the coil.
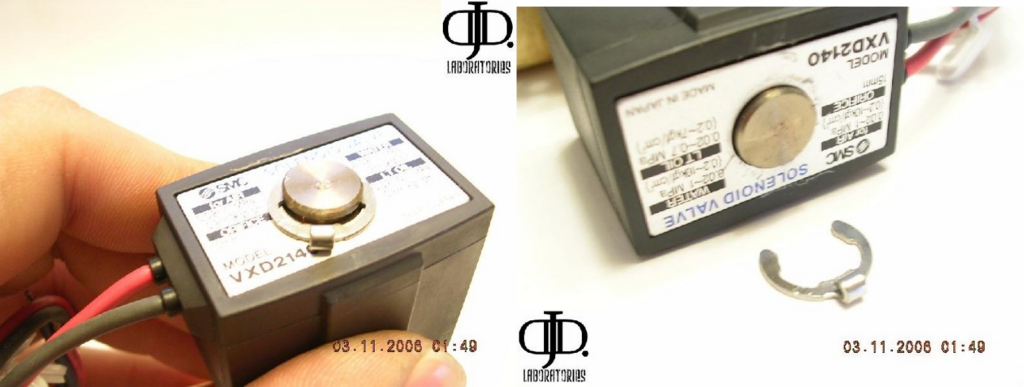
Now press down on the coil and remove the clip the rest of the way with your fingernail it will pop free.
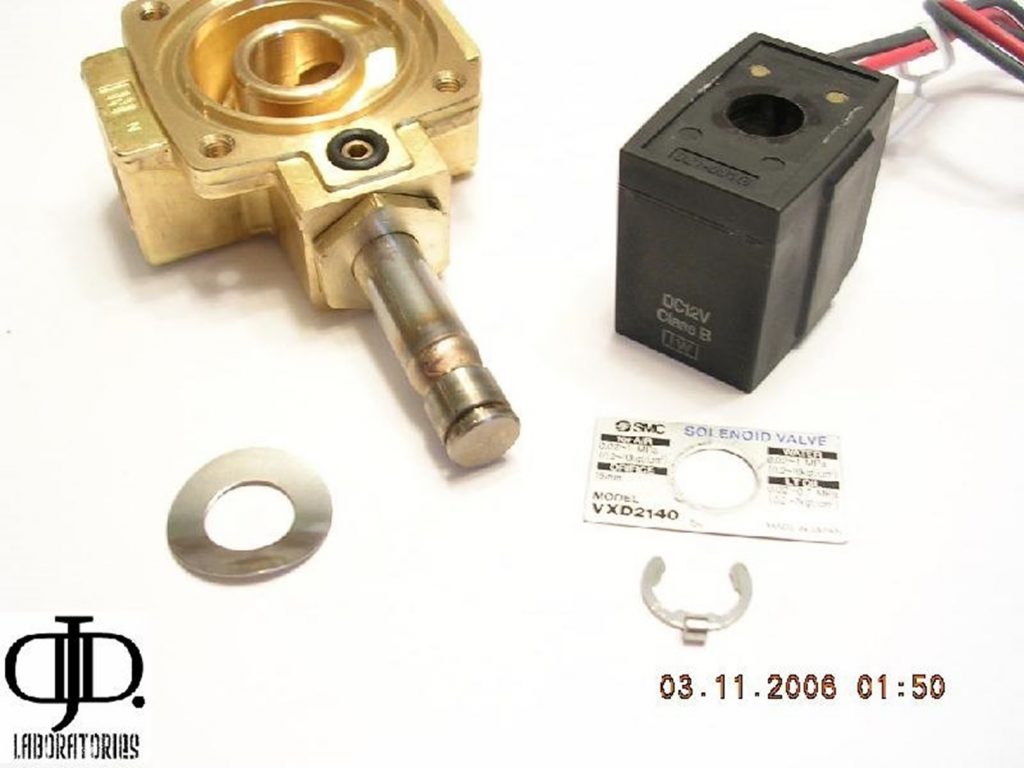
You will now be left with what is shown above. Place all above pieces in a safe place. Now is a good time if your coil is in bad shape does not work correctly or has the wires cut to short you can buy a replacement coil from suisidedoors.com http://www.suicidedoors.com/SMCValveCoil(solenoid).php
15
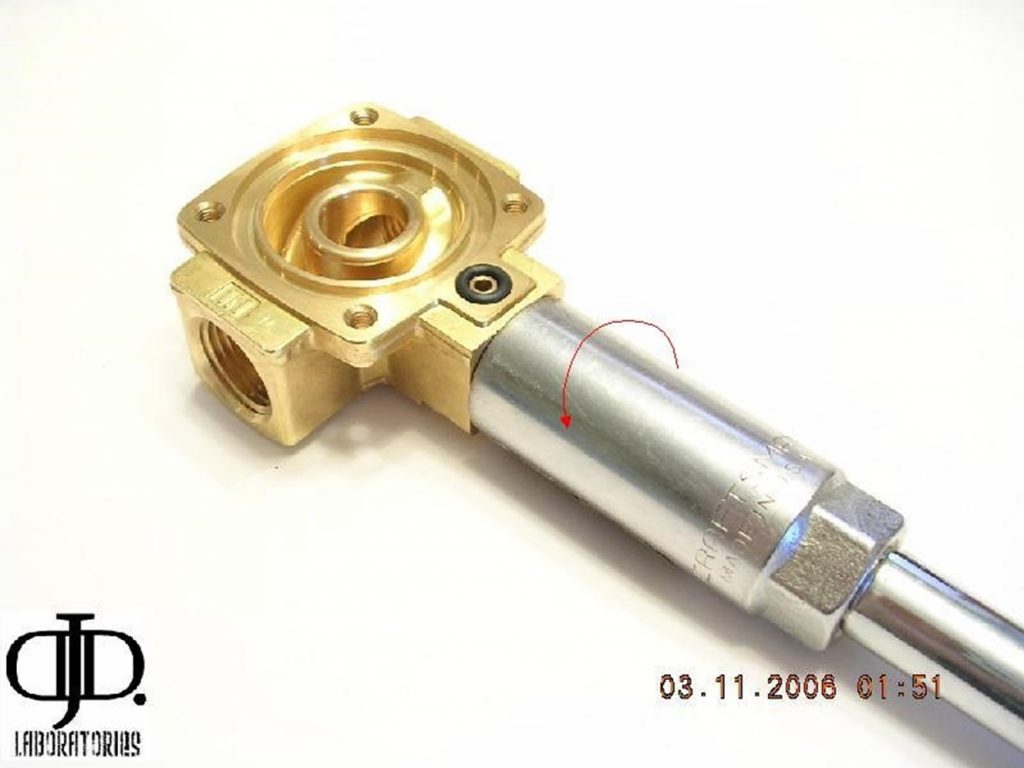
Now grab your 15/16” Deep well or sparkplug socket and slide it down and lock it securely over the post section of the valve. NOTE: This part is very tight I HIGHLY recommend removing your valve from your setup and place it into a vise wrapped in a towel as to protect it and to allow you to get better leverage for removal.
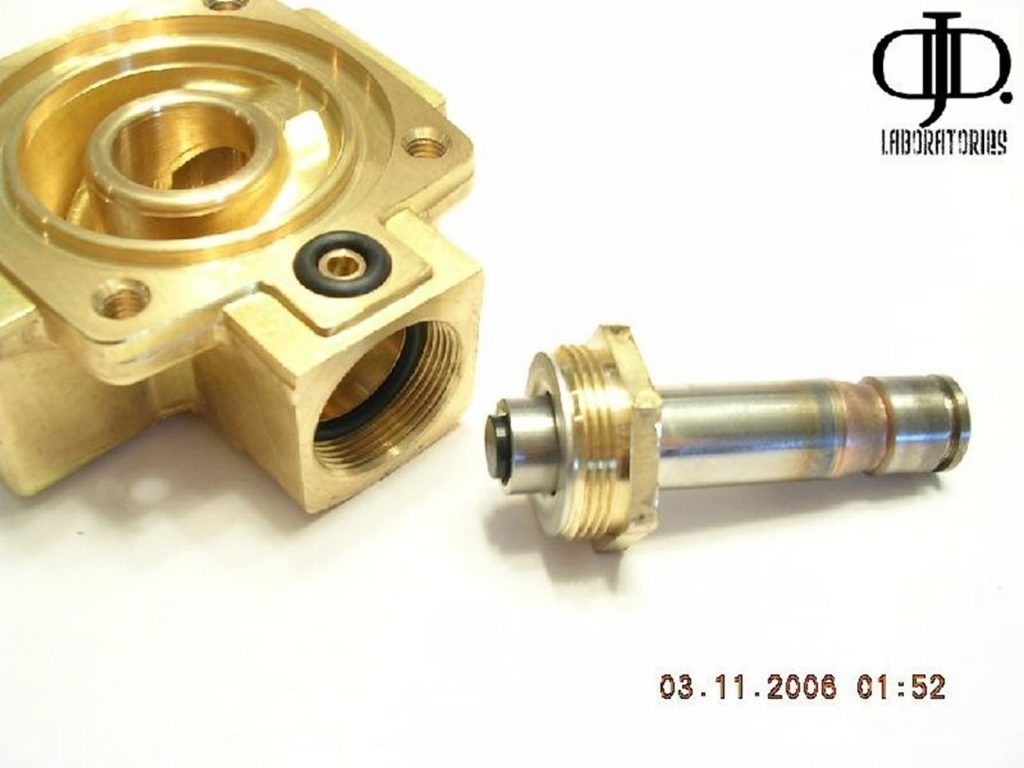
When done you will be left with what is pictured above.
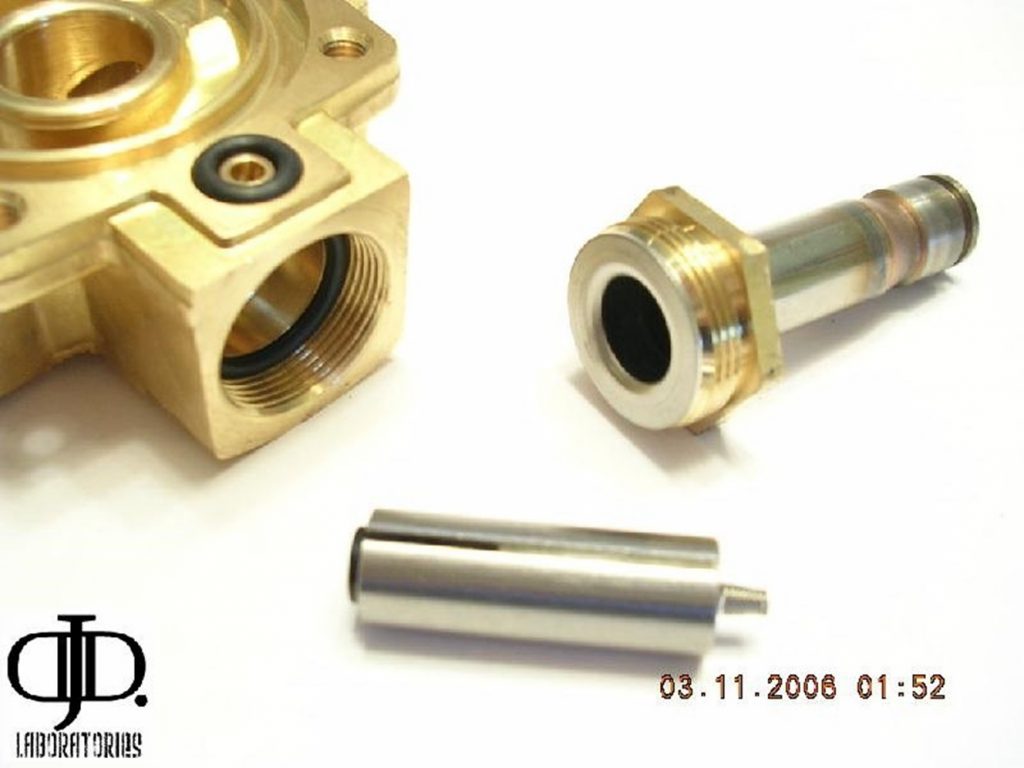
Now The plunger may fall out of the valve when you remove the stud section. This is Normal. NOTE: be sure not to loose the small spring that is located inside of it!
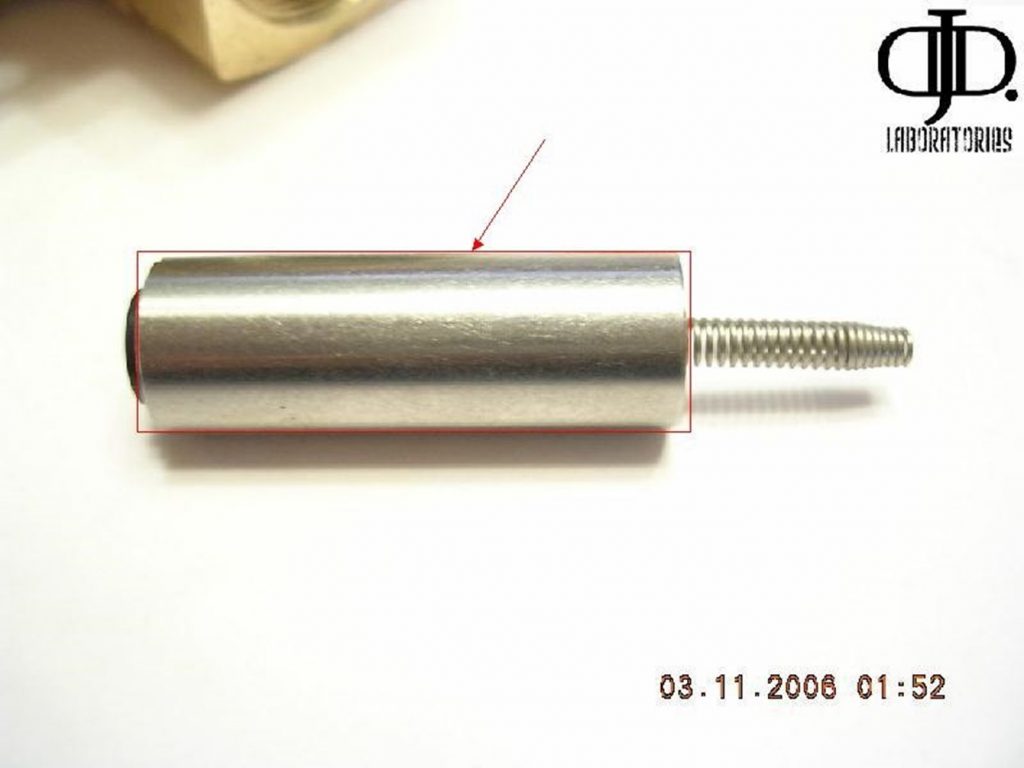
The spring is tapered so make sure you replace it in the correct orientation.
Now you will want to strip off all the old grease from this with your isopropyl alcohol. When dry grab your lithium grease and light lubricate the surface and work it in with your fingers. NOTE: you do not want too much as to be Visible , Just enough to lubricate.
Now also do the same with the INSIDE of the valve post we removed earlier. Poor a small amount of isopropyl alcohol inside plug with your finger and shake it up. Then poor out remainder let dray and spray a quick burst of Lithium grease or put a small dollop of grease on the inside edge.
16
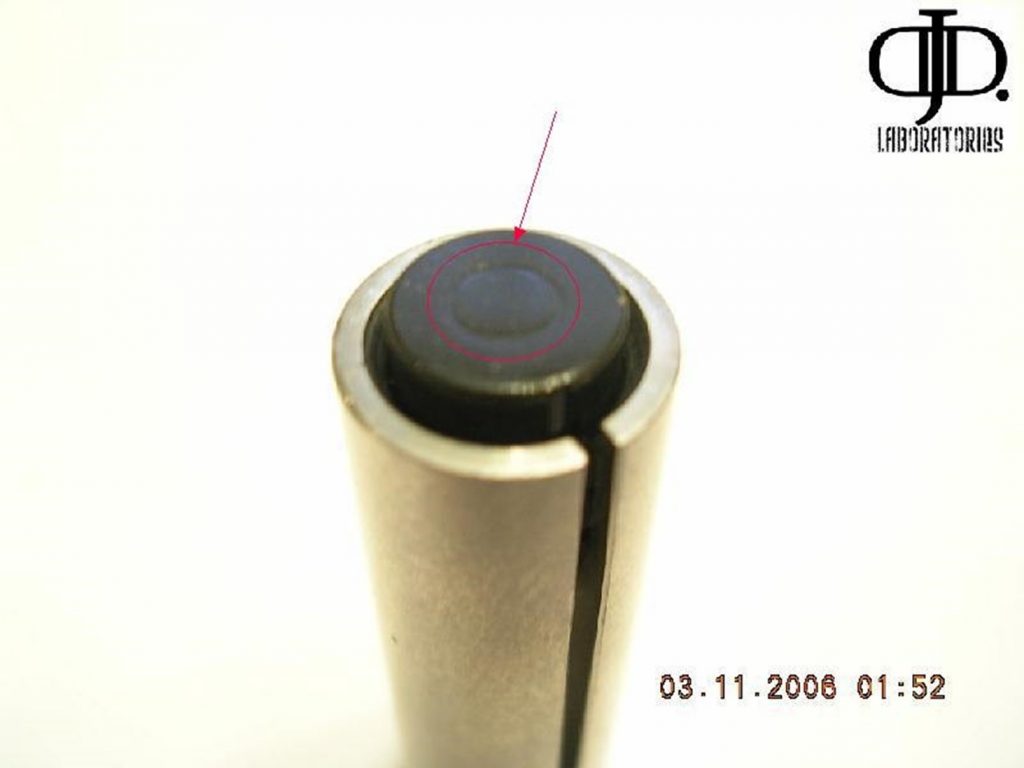
Inspect the rubber matting surface IT should have a slight dimple in the rubber. If it is cut deep or dirty this will lead to the valve sticking as well. Be sure to clean this surface with your isopropyl alcohol.
17
Re-assemble these parts and spin the plunger and move it up and down with your thumb to make sure it moves freely and to help spread the lubricant.
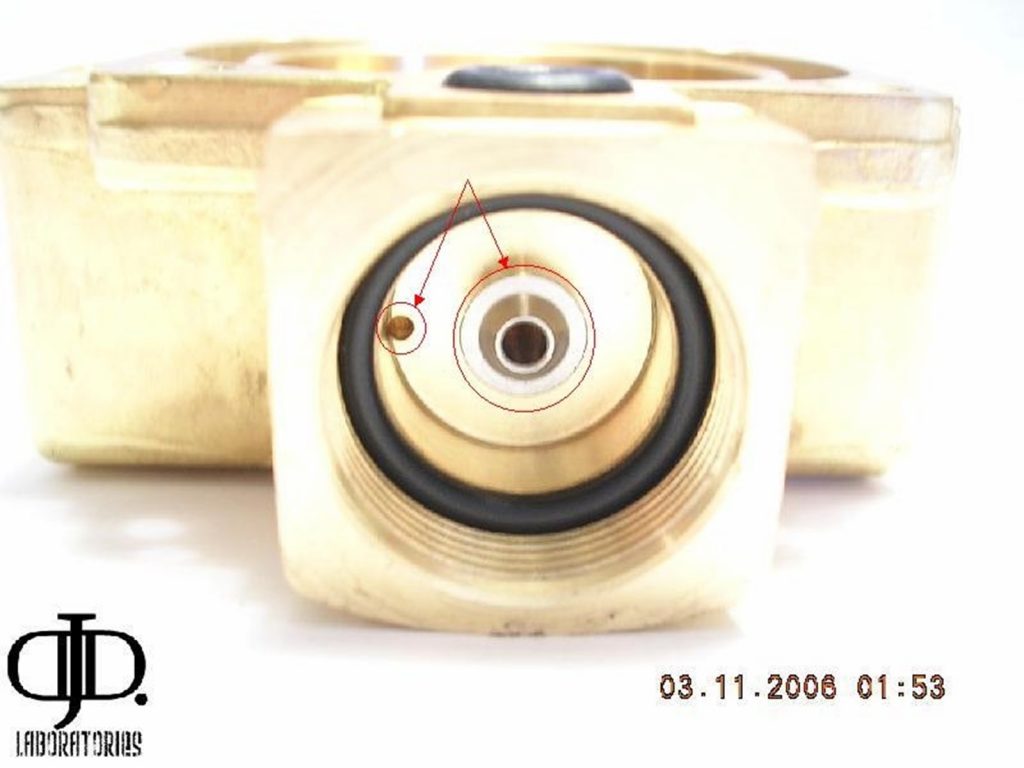
Now inspect the Passageways on the pilot section for any obstructions. You can pour a little isopropyl alcohol into the passage and work it around. And blow out with compressed air. The center hole leads straight up. The left smaller hole Leeds into the main valve chamber.
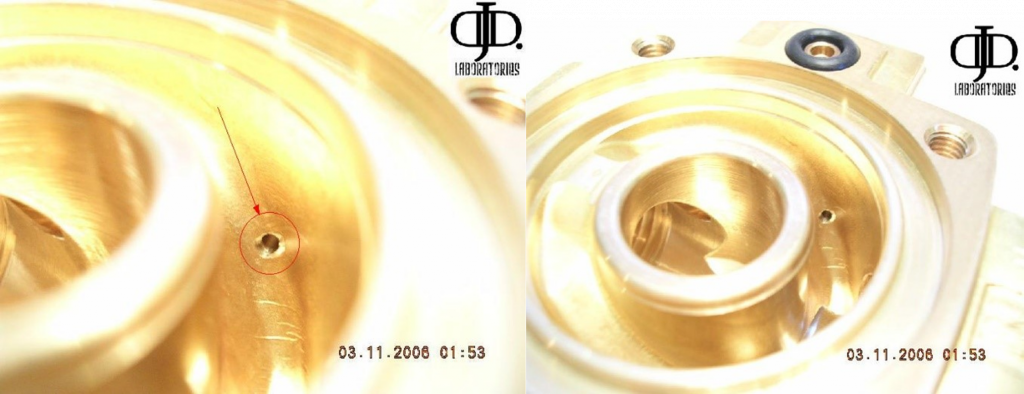
This is where it enters the valve body again make sure this is clean of any obstruction. NOTE: this small passage way is what tends to freeze up in the winter with water that gets into the valve.
18
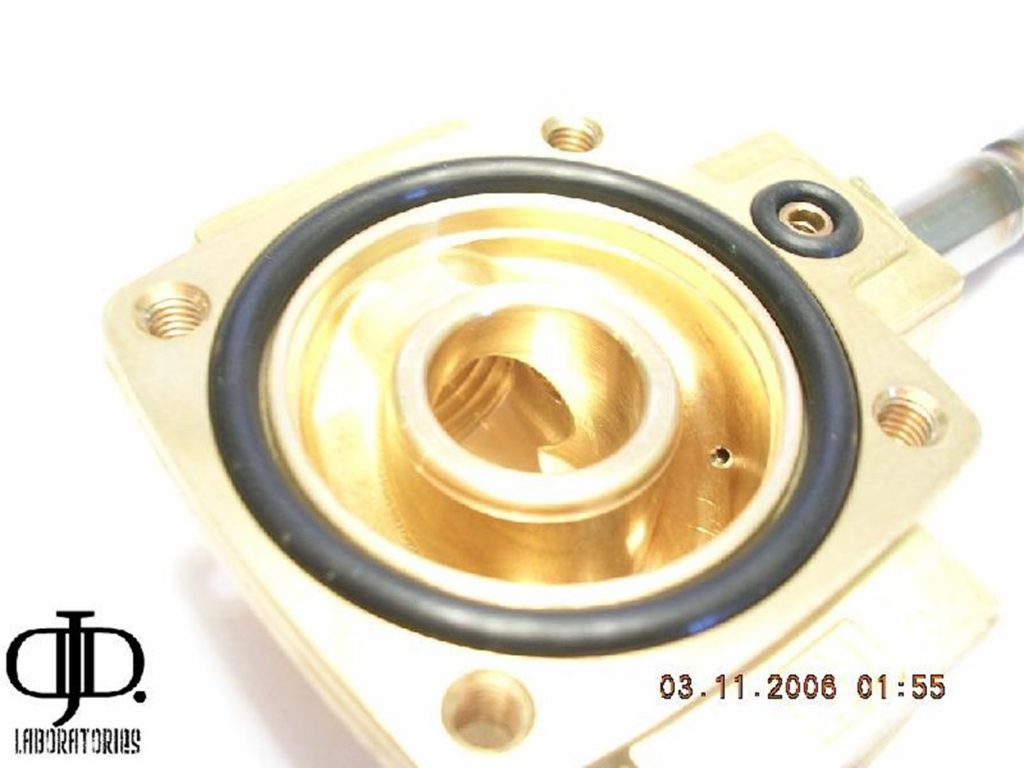
Replace the ‘O’ ring back into the small cutaway on the main valve body. NOTE: this may be a snug fit.
19
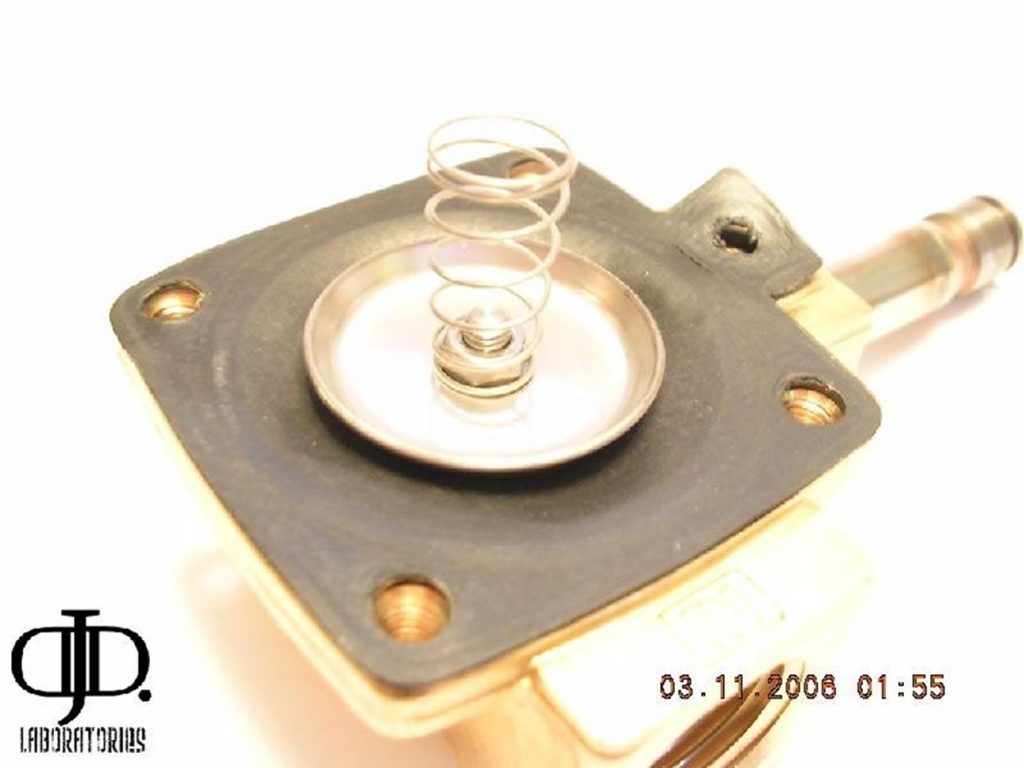
Place the diaphragm assembly back on top of the ‘O’ ring. And square it up over the holes.
20
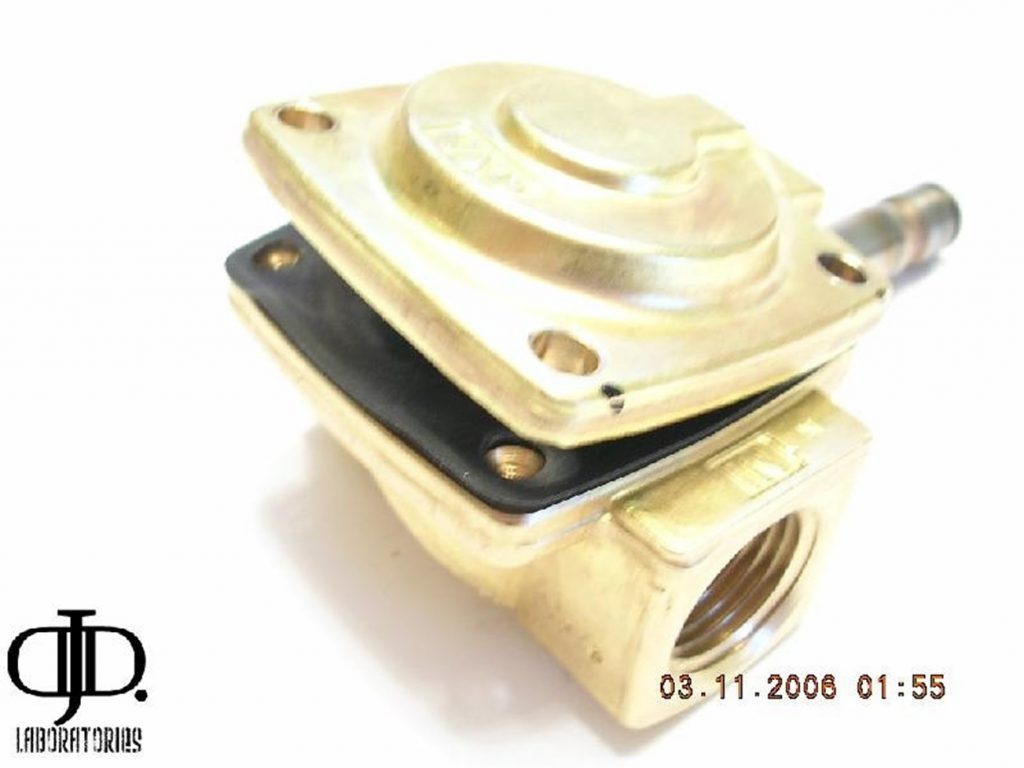
Now place the upper valve body on top of the assembly. The spring will push up on the cover this is normal.
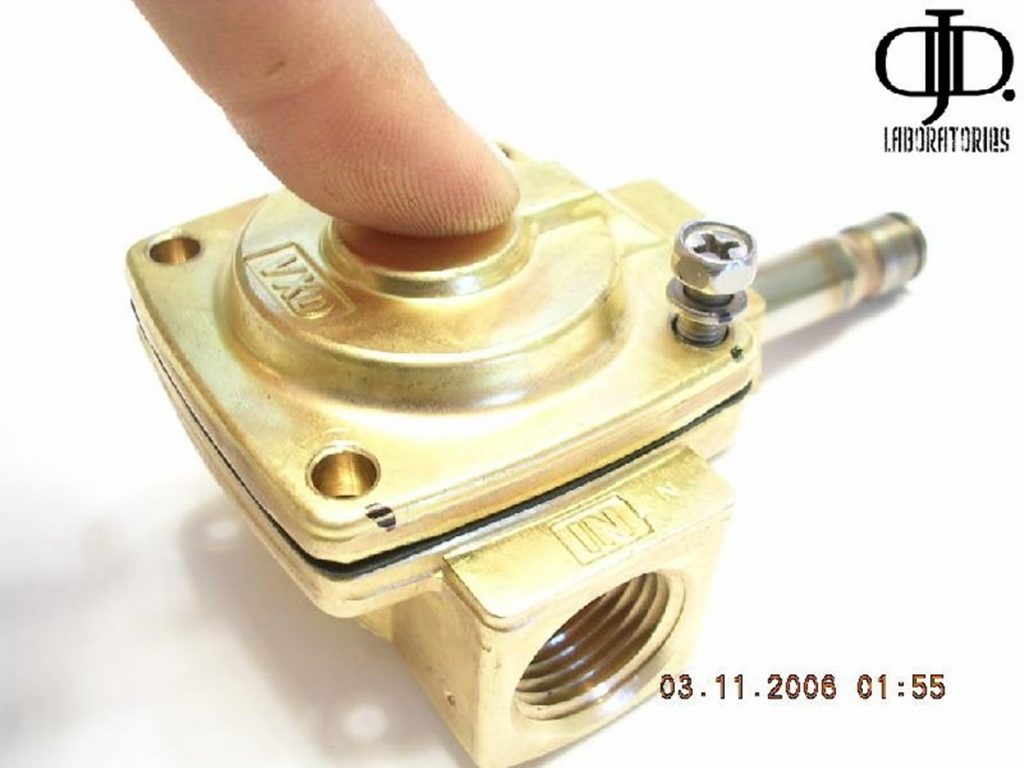
Align up the upper cover and square it up over the holes and press it together and hold it together firmly and start threading in your screws by hand as to be careful not to cross thread.
21
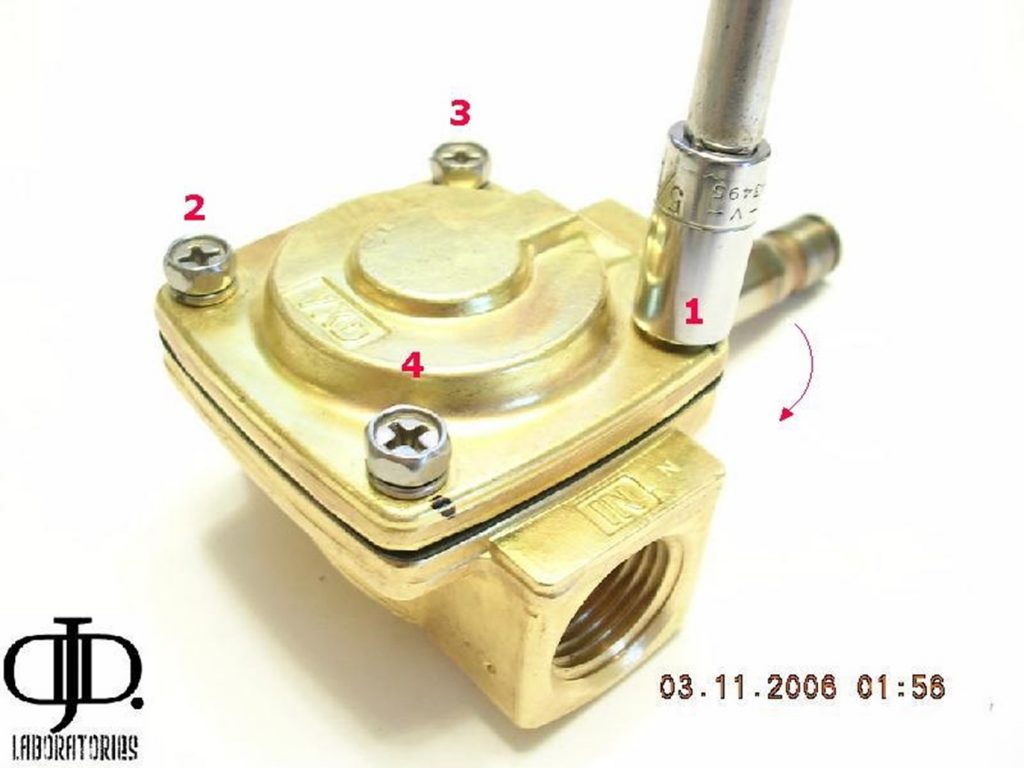
After all screws are snug you can remove pressure and fully tighten the screws. CAUTION:
You will want to tighten the screws in the order listed in the picture. This will ensure a tight seal and prevent the upper body from warping or cracking.
22
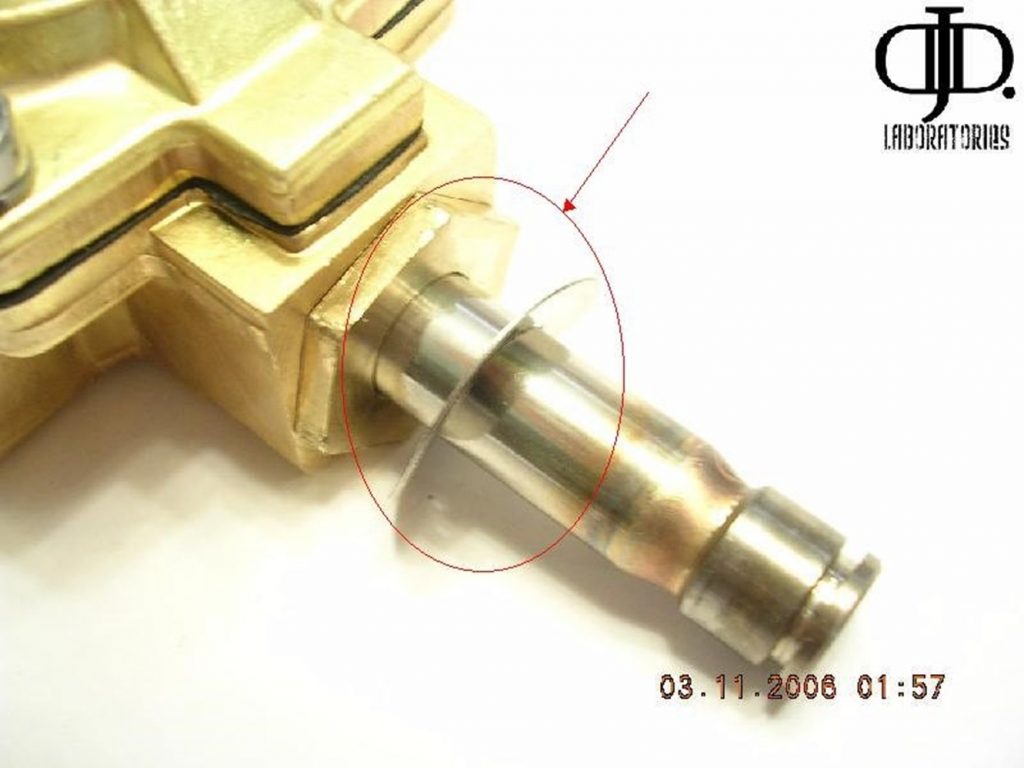
Replace your ‘spring washer’ . NOTE: the washer has a bend to it, install the washer so if you look at it as a ‘C’ You will want the open side of the C to face the coil.
23
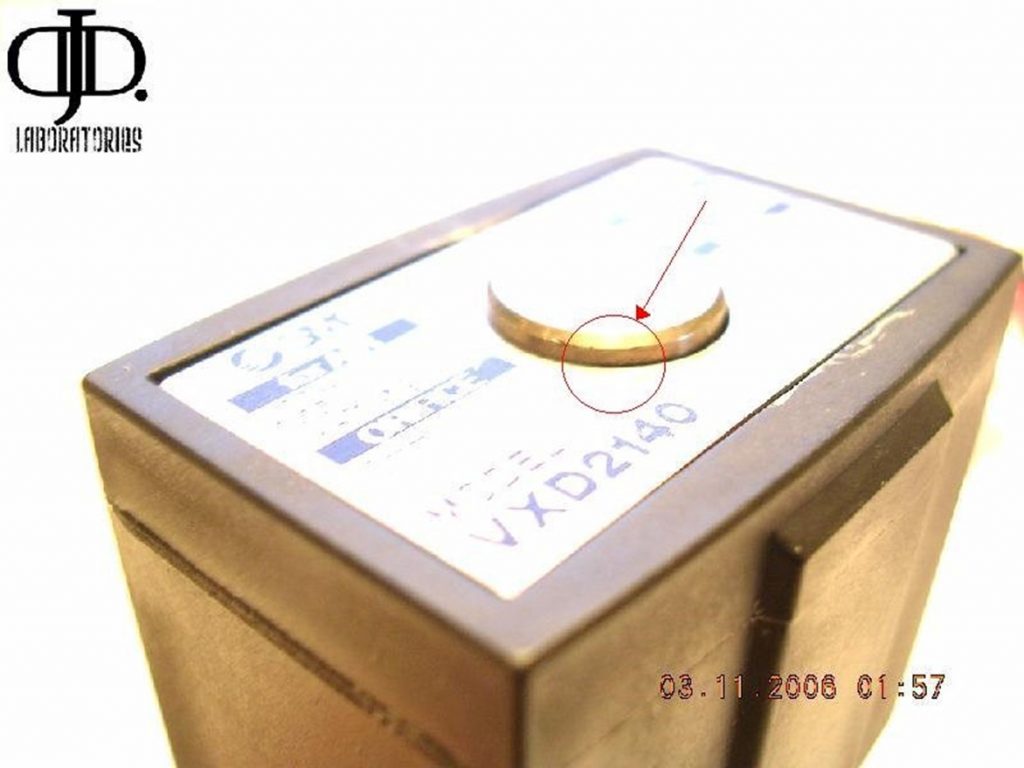
You can now install your coil and name plate. It should sit as pictured above.
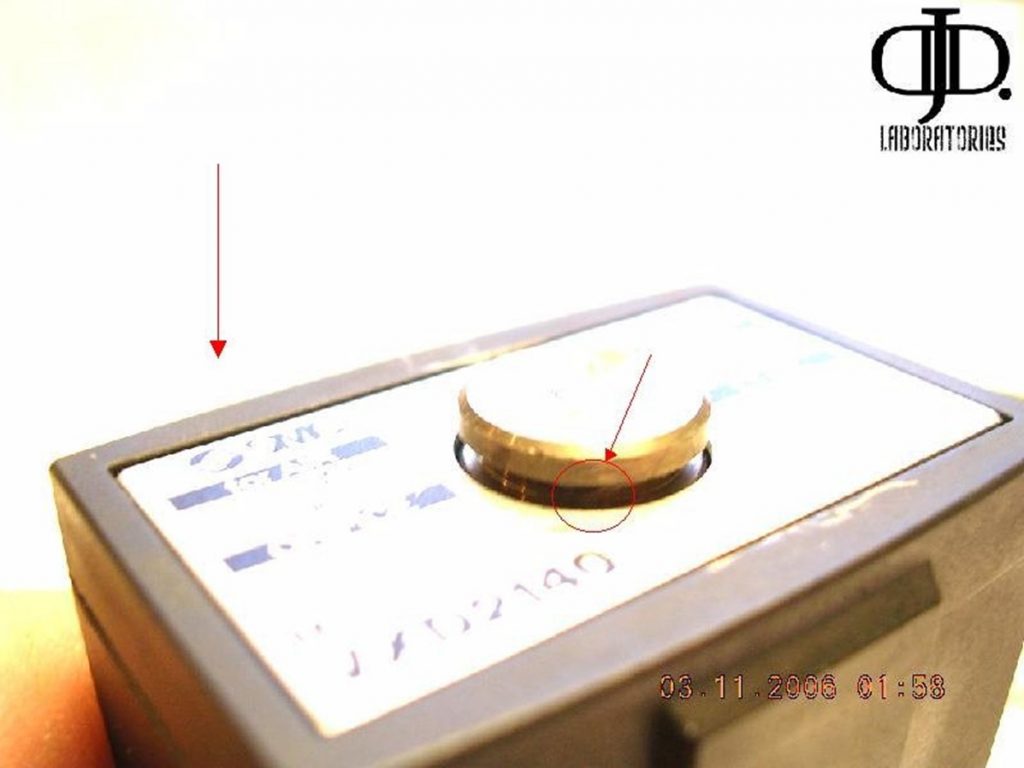
Press down on the coil so the spring clip gap is open.
24
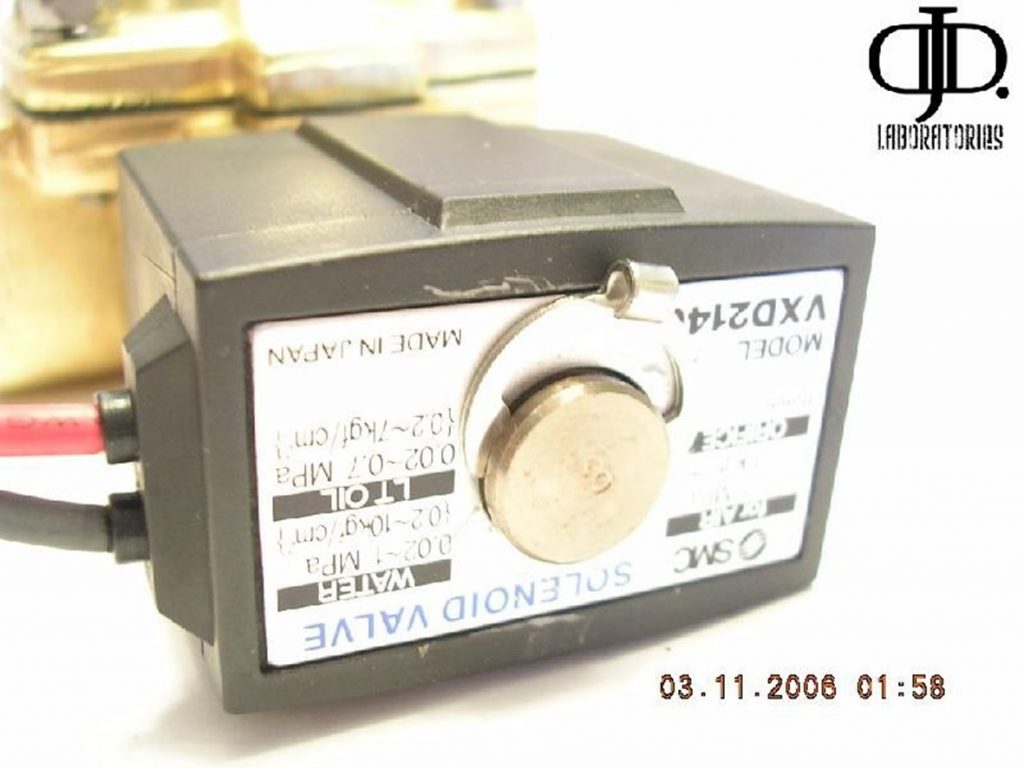
Press in the spring clip as far as you can by hand and grab your standard screw driver. 25
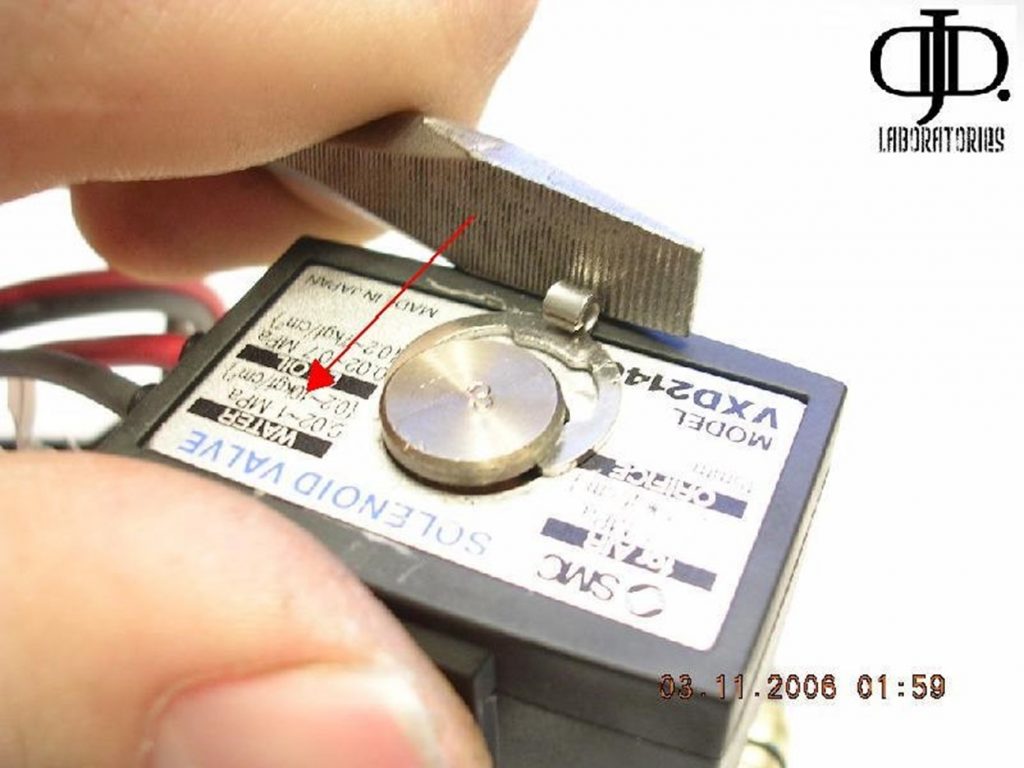
Use the flat side of the screw driver to press the clip onto the stem..
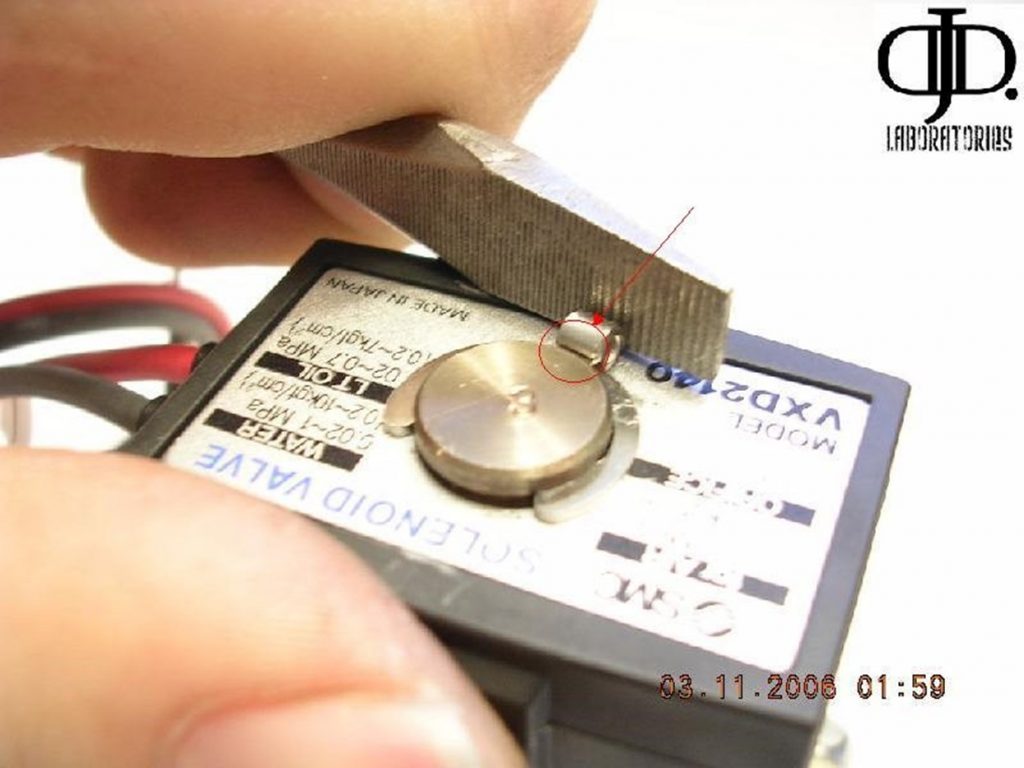
You will now hear a ‘click’ and the ring is now locked. Make sure the ring clip is up tight against the stud.
CONGRATULATIONS!
You have just fully disassembled cleaned and re-assembled your valve.
Now re attach your wires and give it a try. If any problems occur go back through this procedure and check your valve to make sure it is correct.



This was a very well done and informative article and the pictures are great ! Thanks!
P.s. Congratulations is spelled wrong at the end…. probably a typo.
Thanks for the kind words, and the typo catch! All fixed. Thanks!